When the first Iron Man movie came out a couple years ago, it seemed like everyone on the internet was building their own mock up of an arc reactor. One of the key requirements for this to work was to have a material that would cover up the light source and act as a diffuser while being strong and lightweight. InstaMorph fits the bill perfectly!
- Cut the plumbing fixture. – Using the hand saw, cut the plumbing fitting down so its only a single tube around 1.5″ think. If you can find the same amount of tubing use that. We just found that buying a single fitting from a hardware store was easier than asking someone for 1.5″ of tube. Spray paint this tube silver or grey and let dry. You can paint the small washer the same grey color as well.
- Cut the mat board. – Trace the inner edge of the tube you just made onto the matboard or foamcore board and then cut out with the hobby saw. This will be the backing to where you set up your LEDs.
- Set up the LEDs. – We found that surface mount LEDs worked the best here, but you can use regular white LEDs as well. There were surface mount LEDs available at Fry’s Electronics that even had tape on the back, last time we checked. If using regular LEDs, poke the wires through the matboard and place them evenly around the circle. Remember to put a couple in the center here as well for the middle of the arc reactor. Be sure to use enough around the edges to ensure good coverage of light once its diffused through the InstaMorph on top of it.
- Solder the LEDs. – Solder the LEDs together and then wire them up to the battery clips. You can optionally add a switch into the circuit here as well, but we ended up just pulling the battery when we didn’t want it to light up. When soldering, be careful not to burn the board the LEDs are attached too. Once your done soldering, add the batteries and make sure everything lights up here. If something is wrong, fix it now, as it will get almost impossible to access these LEDs again.
- Add InstaMorph. – Place the LED board inside the back of the painted tube. Heat up enough InstaMorph to cover the surface of the LEDs up to around a 1/4″ from the top edge of the tube. Please heated InstaMorph inside the tube and press down, making sure surface is level all around.
- Add center piece. – Taking the 2 liter coke bottle, cut off a circle out of the top curved part which is a little bigger than the inside of the washer. This will make a nice concave bubble that will fit inside the washer and create a curved porthole effect. Glue the plastic to the washer and then glue the combined piece to the center of the arc reactor.
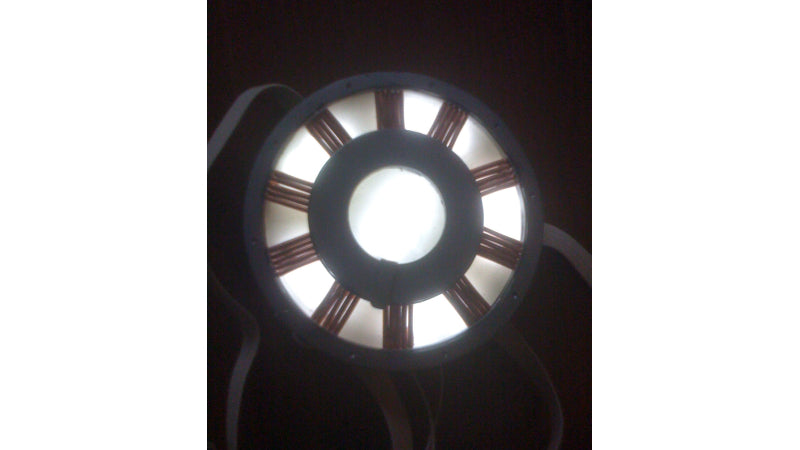
- Add finishing touches. – We choose to add pieces of stripped copper wire at intervals around the center. You can do something similiar, or use painted toothpicks, solder wire, coffee stirring straws, or whatever you think looks and works the best.
This is your own personal arc reactor, so don’t worry if it doesn’t look just like the one from the movie. People freaked anyways when this was lit up and worn out for Halloween. Well, the people who saw Iron Man did at least.
If you’re wondering what the bands behind the arc reactor in the picture are, that was elastic fabric that was used to make a harness. The harness had Velcro sewn into it and then the other half glued to the back of the arc reactor. This allowed the arc reactor replica to be worn under a shirt like in the movie. You can try something similar, something different, or just put it in a glass box as proof that you really do have a heart.
#ironman #marvel #superhero #fandom #halloween #cosplay #costume #lights #technique

