Homestuck fans! The following tutorial is re-posted (with permission) from Mage W’s blog. It’s all about how to make a hidden headback troll horn attachment.You can find all her awesome and helpful stuff over at http://magebird.tumblr.com. Ok Magebird, take it away!
“For my horns, I used InstaMorph Moldable Plastic. The best way to put a screw into the base of these types of horns is to push it in while the plastic is still soft and let the horn harden around them. If this isn’t an option, you can simply drill directly into the horn (use a screw that says it will drill its own pilot hole or use a narrow drill bit before using the screw). If you’re using InstaMorph, the heat of the drilling may cause some melting, so be sure to let it harden again completely before you proceed from this step. Some plastic may squish out of the hole you drill and around the head of the screw, but as long as it isn’t sealed over completely, this isn’t a big problem. You can smooth it down or cut it off later, if you prefer.

Once your screws are through the headband at the angles you want, secure the bases with a little hot glue or another smear of the plastic. This will ensure they don’t move around while you’re screwing the horn on later.

Next, you’re going to want to put the headband either on your own head or on a wig head. Because styrofoam heads don’t have exactly the same proportions as a real one, I recommend getting a buddy to help you out and using your own head for the process. This will also make sure everything is in the right spot.

Next is the kind of tricky part. carefully lower your wig over the top of the headband, and push the screws through the cap of the wig and up through the hair. Depending on how your wig is made, they may just slide through between the wefts, or you make need to poke a small hole. Don’t just shove them through, as this may cause damage or tearing to your wig! This is a part where it’s useful to have a buddy who can assist with positioning and snipping. Make sure to part the hair away from the screw as much as you can so it doesn’t get too caught under the base of the horn.
Once the screws are through your wig, take your horns and start to screw them on. Your screws should be secure, and it shouldn’t take long to get the horns seated properly.

Once the horns are screwed all the way down, arrange the hair around the base, then step back and give yourself a little round of applause. You’ve attached a horn! Finally, repeat the process with the other horn, and you’re all set.

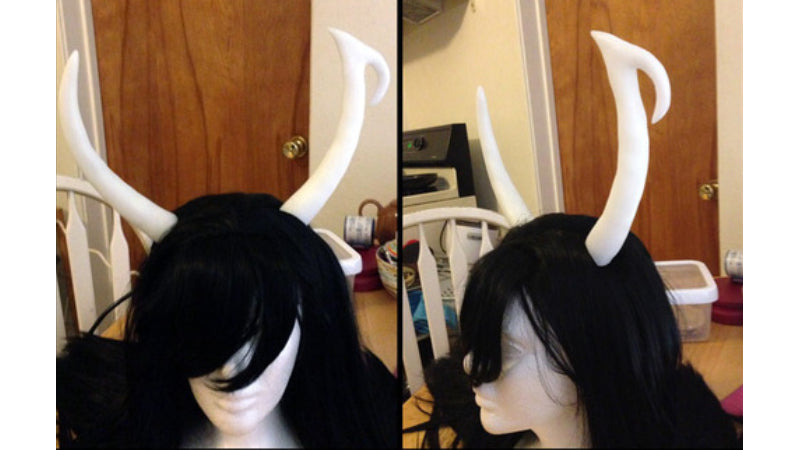
As you can see, my horns here look a little wonky because the wig head is a lot smaller thank my head, and I’m not using my actual Kanaya wig for this tutorial, but you get the idea. This is a great way to attach horns of any size and to hide headbands of pretty much any style or color.”