Lindsey tells us about her very unique project for her very unique situation. What do you do when you want a paper towel rack installed, but you’re in a rental don’t want to damage surfaces by screwing into them. Well you can either (1) screw into them anyways and try to cover it up before you leave, (2) deal with your paper towels on the counter, or (3) build a custom, spring loaded, InstaMorph enabled paper towel rack to fit under the shelves like Lindsey did!
Lindsey took the time to tell us many of the details about her build. We’re really glad she did, as there are some awesome tips and tricks in there. Thanks again, Lindsey…
https://www.youtube.com/watch?v=n0o1yYN_77Q
“It really helped to work on it a little at a time, as that way each part could solidify and resist deforming as I worked on the next part, and it made it easier to form each part before it stiffened too much. To make cooled parts stick to warm ones, I simply stuck the tip of the cooled part back into the hot water until the outer edge turned clear. To cool parts down quickly (and reduce the chance that they would deform while cooling) I placed them in a pot of cold water.
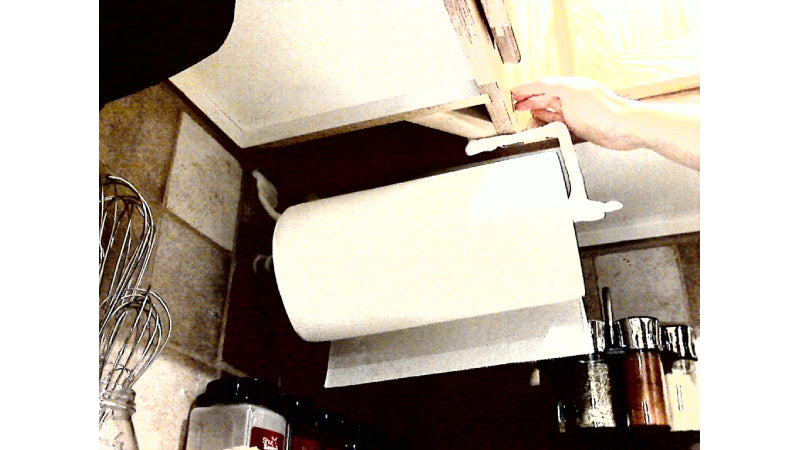
The part that wraps around the wood beam and the flat part that presses against the ridge of the wall were both made by squeezing them directly to their intended destination – thereby using the wall and the beam themselves as molds.
About halfway through, I realized that the piece with the spring was not going to be long enough, so I cut it in half and inserted another inch of InstaMorph in between the two halves, using the aforementioned method of reheating cooled parts.
Forming the hole into which the brush is inserted was quite tricky, as there was no way to take it off the wall to cool without deforming it. I ultimately decided to just use a guess-and-check method, although if I were more patient I could have held it in place on the wall as it cooled.
The part that is wrapped around the brush was also tricky to make, since it kept loosening every time I tried to squeeze it tight around the brush. Twisting it (as one would twist a wet cloth to wring out the water) while squeezing helped a lot. Starting with a thinner layer and then building additional layers on top of that also helped, since thinner layers cool more quickly (meaning less time to loosen.) Remember, you don’t have to melt a piece all the way through for a warm piece to bond securely to it; as soon as the edge is visibly clear, it is sticky. It doesn’t matter if the center is still solid white.
I made the rack because I overheard my housemates talking about how annoying it was that our roll of paper towels kept wandering around different (potentially dirty/unsanitized) counters in our kitchen, and it just got in the way wherever it went. Some of my housemates were astonished by the finished product; others (who didn’t see me making it) just assumed that it was store-bought until they saw me filming the video for this contest. I think they were even more astonished to discover the true story of its construction.
As it happens, this particular project will have a very short life in its present form. I’m moving out of this house in a few months, and this rack is uniquely tailored to its spot – it wouldn’t be much use elsewhere. Since no glue was used in the making of this project, I will be able to reclaim full use of the paintbrush after the plastic is melted off of it – and better still, I’ll be able to reuse the plastic itself for another awesome project! (If I had intended it for long-term use, I would have purchased a proper wood dowel for the rod; the paintbrush was just something I happened to have on hand.)
It took about three or four hours to complete this project. This was my first attempt at making something using InstaMorph, and if I were a little more experienced, I expect it would have taken about half as long to complete.”