We got an email from a fan, Kay, asking for techniques on using InstaMorph in a home built mold. His mold uses PVC and wood, however PVC is a substance that InstaMorph will readily bond with. He proposed using some car paint and wax to ensure that the InstaMorph came out of the mold easily.
We asked Kay if he would send us some instructions and pictures for the rest of our fans to use, and he graciously sent us this great how too. Thanks again, Kay!
--------
Background
The project was to make an adapter to fit over a faucet handle that had all but one segment broken off. This adapter eventually had to be attached to an existing “T” handle, fit through a two inch diameter access hole, and be capable of turning the faucet on or off four feet below the access hole in a four inch casing.
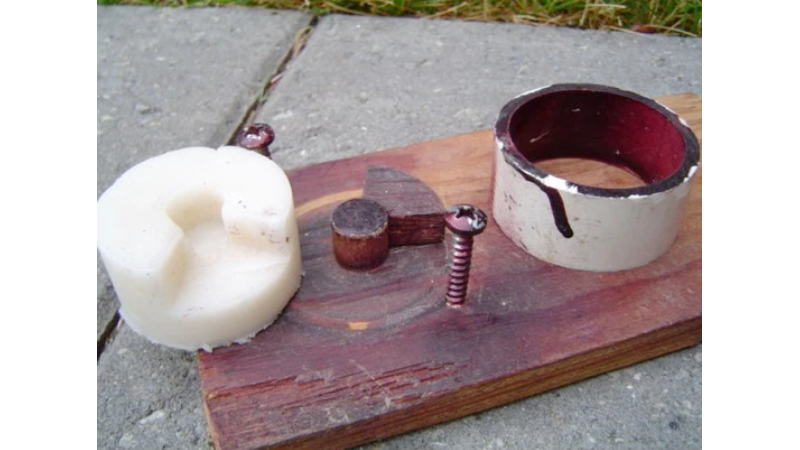
InstaMorph Mold
There were concerns about the IM sticking to the mold, especially the PVC ring, so the areas that would be contacted by the IM were painted with some old, car touch-up paint. In addition, Johnson’s paste wax was applied to those surfaces. Since this was the first project with IM, it was unknown if this was necessary but supposedly there may be sticking problems with PVC.

Molding
It was important, to the function of the adapter to capture, in detail, certain portions of the shape, especially those being the sharp features around the segment shaped area. It was decided to put just small portions of the melted IM in that area, one at a time, so that direct pressure could be applied there to force the IM into the corners and crevices while quickly backing up that work with larger portions of melted IM. In that manner, working backwards, away from finished areas and always forcing the material towards those finished area, the mold was eventually filled. Again, being the first project using IM, the plan was to be overly cautious so that the possibility of success on the first try would more likely.

Results
It seemed to be difficult to photograph the result itself, especially the sharp corners, some of which appear to be rounded but, in fact are not. The somewhat translucent nature of the hardened IM, especially in the case of the male corners, can be blamed It can be said the result was very satisfactory as shown slightly better in the closer view and where the sharp edges have been darkened with a marker.

Observations
The amount of IM needed, in the supplied form, turned out to be almost exactly twice the volume of the finished product. This is not really important because extra material can be allowed to harden, stored, and then melted again for the next project but it is a convenient fact to know when planning. For this project the mold was used to measure the amount of IM pellets, i.e., two fillings of the mold were placed in the melting water and it was almost exactly the correct amount needed. One of the available supplied forms is 12oz and contains approximately thirty cubic inches.
The idea of forming critical areas with small amounts of IM and then proceeding to work backwards towards less critical areas, always forcing hot, backup material against those finished critical areas, worked fine. Larger molds might require more than one person to keep hot material against cooling material so that continuity is achieved.
Small tools can be helpful to force material into corners and intricate shapes. For this project some of the tools from a wax carving set were helpful.